The Presentation Environment
Article courtesy of AmpliVox
There are many physical aspects that make up a successful training environment. They include the shape and design of the room, lighting, acoustics, furniture, visual aids, and seating arrangement.
The Shape and Size
- Ideally, the length of a training room should not exceed its width by more than 50%.
- Position the entrance in the rear of the training room. This allows people to leave and enter the room without distracting the lesson.
- Estimate the average number of trainees participating in the training sessions and the planned activities for the lesson. Crowded training sessions severely detract from the education process.
- Allow sufficient room for your "activity space". Be aware of space required for physical activities such as role-playing.
- Avoid support columns and low hanging lighting such as chandeliers. These features create voids in which participants cannot see the instructor or visual aids.
Lighting
 Issues for the VDT and AV intensive Training Rooms:
- Too much light impairs the image of the VDT screen or AV presentation. Most human factor experts favor indirect illumination. However, this can cause some trainees to feel as if the room is overcast.
- Supplemental lighting should be used to brighten walls. This gets rid of the gloomy feeling caused by indirect lighting.
- The ability to control the light source is very important, especially in a mixed-use situation. Multiple switches and dimming control systems are two popular choices.
- Issues for training in classrooms with no VDT terminals and little AV hardware:
- Natural light has a great effect on the morale and boredom threshold of trainees; although some experts believe windows create a distraction to the training process.
- A good compromise is to place windows higher in the room, blocking distracting views yet allowing sunlight to enter the room
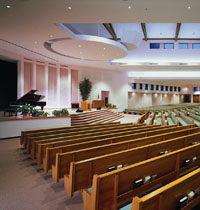
Acoustics
The two main objectives of training room acoustics are to maintain speaker clarity and to keep random noise to a minimum. AmpliVox provides a complete line of amplified rostrums and personal voice reinforcement systems whose power, simplicity and ease-of-use assures that your message is heard.
- Location of the training room - Avoid positioning the room near highways, crosswalks, or high traffic areas. Training rooms should be positioned in quiet areas. Sound insulation can be installed if external noises are unavoidable, but it is expensive.
- Sound requirements and coordination - This is a technical issue. The objective is to make sure the room absorbs and reflects the correct level of sound for its size. These issues should be discussed with an acoustical consultant.
- HVAC impact - Many rooms are plagued by noisy heating, ventilation and air conditioning systems. Situate the training room as far away from the HVAC system as possible.
- Size and shape of room - There is no perfect acoustical shape for a room, but certain elements are important. Construct the ceiling with acoustical tile and the wall with gypsum board. Acoustical tile should cover the back wall to eliminate reverberation. In larger rooms, the shape of the interior comes more into play. The “pie” or “trapezoid” are proven shapes. The same construction material is recommended here as well.
- Audio systems - Speakers should be powerful enough to reach people sitting in the back without blaring at the people in the front. As a general rule, any space that is longer than 40 feet in any direction would most likely require some sort of sound system. For extremely large rooms use two sound systems; one for live speakers and one for AV presentations. For live speakers, an overhead sound system with alternated speakers works best. AV speakers should be placed at the front of the room near the image source.
- ADA requirements - The American Disabilities Act requires that public assembly areas with permanently installed public address systems provide assistive listening systems for persons with hearing impairments. Personal receivers may be required at specific seats throughout the room.
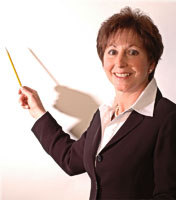
Visual Aids
- Displays
- Overhead projectors
- Multimedia
- Screens - to determine the proper size and placement of the screen in regards to the audience, use the following guidelines:
- Make sure the bottom of the screen is 42 inches from the floor.
- The distance of the screen to the last row of seats should equal six times the width of the screen.
- The distance from the screen to the first row of seats should equal twice the width of the screen.
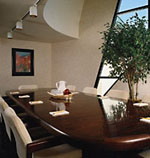
Furniture
When considering the furniture for a training room, flexibility seems to be the key issue for most companies. Many can only devote a certain amount of space to training. For example, the same furniture may be used for computer-based training in the morning and might then be used to accommodate a role-playing exercise in the afternoon. Experts say that tables, chairs, and walls can often make or break a training session.
Lecterns
This piece of furniture has been used since the early days of public speaking. There are two common types available today, floor and tabletop. The Floor Lectern (such as the AmpliVox Elite, Presidential Plus, Chancellor or Sound Column models) is freestanding and usually accommodates lights and a sound system.
Many trainers prefer a smaller format lectern because it creates less of a barrier between them and their class. Tabletop Lecterns (like the AmpliVox S250, the EZ Speak and ShowStyle Roving Rostrum) allow a lower profile and openness with the class. They are placed on top of a table and the extra table space can be helpful for keeping papers and lecture material close at hand.
The Facilitator Table is a hybrid of the lectern and has come about in the last decade. This piece of furniture accommodates an overhead projector, CPU, and a tabletop lectern. It is used mainly as a teaching station. Many trainers prefer this because it permits them to control all lesson materials and functions from one location.
Tables
Flexibility and Storage - Determine if the tables will need to be moved around
or fixed.
Wire Management - If computers are being used, be sure the tables can accommodate
the electrical hook ups.
Size and Shape - 30” x 60” and 24” x 60” are the
most commonly used table sizes.
Design - Matching design with other furniture and equipment in the room creates
a pleasant environment.
Spacing - When using 30” deep tables, allow at least 66” from
table front to table front (72” inches is ideal.) When 18” deep tables
are being used, 54” provides adequate space but 60” is ideal.
Chairs
Stacker or Folding chairs - inexpensive, used where space is a premium, for
sessions under two hours, provide little adjustment for the user who may get
restless and lose focus after a while.
Task or Ergonomic chairs - used when participants are asked to sit for long periods
of time. Make sure it is height adjustable by at least 6 inches; arm rests should
enable the trainee to rest their arms flat, creating a 90 degree angle at the
elbow. Casters also add mobility and can save time and effort when reconfiguring
the room. One word of caution: the chairs should not be too comfortable,
or you may lose your audience to sleep.
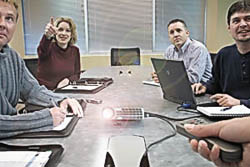
Configurations
The way a trainer arranges a room dictates the effectiveness of the training session. The goal is to create an environment that promotes learning by both students and trainers interacting freely and constructively together. To accomplish this, a trainer must evaluate how the room will accommodate the lesson plan. Here are some important questions to ask when considering a furniture arrangement for the training room:

- Will audio-visual equipment be used and how frequently?
- Will presenters prefer standard wired microphones or the "freedom to roam" wireless mic systems afford?
- Will they want the audience intimacy provided by a tabletop or ultra portable rostrum, or would they be more comfortable behind a full-size lectern?
- Will the student need tables to write on or take notes?
- Will they need room to perform physical activities?
- Will the participants take part in discussion groups, large or small? Will
the sound
system need to support multiple mics for interactive discussion?
- Will the tables need to accommodate computers?
- Will the trainees be asked to participate or observe role-playing exercises?
The furniture and seating arrangements can be organized in a variety of different ways. Each arrangement is used for a specific type of instruction to maximize the efficiency of the lesson being taught. The more flexible the furniture, the easier it will be to create different seating styles to fit the immediate need.
Here are some terms that will help evaluate the following seating configurations.
Accommodates AV simply implies if the seating arrangement is conducive to
visual displays or multimedia presentations.
The Action zone denotes where most of the instruction or group involvement is
taking place.
Group involvement refers to the amount of participation the students are actually
involved in during the lesson.
Seating refers to specific seating requirements recommended when using a certain
configuration.
Tables refers to specific table requirements.
Space per person recommends the amount of space needed per individual in order
to be comfortable without being cramped or isolated.
Maximum # of people expresses the highest quantity of participants that can successfully
gather information and constructively participate in the lesson.
Advantages and Disadvantages specify the pros and cons of each setup, respectively.
Variations or hybrids describe slight changes made to the arrangement to accommodate
specific applications or problems.
Camcor.com links

|
|

|

|
![]()
Contents of all material on website ©2025 Camcor, Inc. All Rights Reserved.